Showing posts with label packet tracer. Show all posts

acl configure in eigrp routing on cisco router

By // No comments:
How to configure Access control list (ACL) in EIGRP routing on Cisco router?

ACL configure in EIGRP routing on Cisco router


Extended ACL (100-199)
Denies or permit: source ip address,
destination ip address, port(services)

Extended ACL (100-199)
Applied closest to the source


Router0 Configuration

Router0#sh run

Building configuration...

Current configuration : 675 bytes
!
version 12.2
no service timestamps log datetime msec
no service timestamps debug datetime msec
no service password-encryption
!
hostname Router
!
enable password just@123
!
ip cef
no ipv6 cef
!
interface Loopback1
ip address 192.168.0.1 255.255.255.0
!
interface FastEthernet0/0
ip address 1.1.1.1 255.0.0.0
duplex auto
speed auto
!
interface FastEthernet0/1
no ip address
duplex auto
speed auto
shutdown
!
router eigrp 101
network 1.0.0.0
network 192.168.0.0
auto-summary
!
ip classless
!
ip flow-export version 9
!
!
!
no cdp run
!
line con 0
!
line aux 0
!
line vty 0 4
password 1234
login
!
!
!
end


Router1 Configuration

Router(config)#access-list 101 deny icmp host 1.1.1.1 host 3.3.3.4 echo
Router(config)#access-list 101 deny tcp host 1.1.1.1 host 3.3.3.4 eq telnet
Router(config)#access-list 101 deny tcp host 2.2.2.3 host 1.1.1.1 eq telnet
Router(config)#access-list 101 deny icmp host 2.2.2.3 host 1.1.1.1 echo
Router(config)#access-list 101 deny icmp host 2.2.2.3 host 192.168.0.1 echo
Router(config)#access-list 101 permit ip any any

Interface configuration

int fa 0/0
Router(config-if)#ip access-group 101 in
int fa 0/1

Router(config-if)#ip access-group 101 in

Router1#sh run

Building configuration...

Current configuration : 1065 bytes
!
version 12.2
no service timestamps log datetime msec
no service timestamps debug datetime msec
no service password-encryption
!
hostname Router
!
!
!
enable password just@123
!
ip cef
no ipv6 cef
!
interface Loopback1
ip address 192.168.1.1 255.255.255.0
!
interface FastEthernet0/0
ip address 1.1.1.2 255.0.0.0
ip access-group 101 out
duplex auto
speed auto
!
interface FastEthernet0/1
ip address 2.2.2.2 255.0.0.0
ip access-group 101 out
duplex auto
speed auto
!
router eigrp 101
network 2.0.0.0
network 1.0.0.0
network 192.168.1.0
auto-summary
!
ip classless
!
ip flow-export version 9
!
!
access-list 101 deny icmp host 1.1.1.1 host 3.3.3.4 echo
access-list 101 deny tcp host 1.1.1.1 host 3.3.3.4 eq telnet
access-list 101 deny tcp host 2.2.2.3 host 1.1.1.1 eq telnet
access-list 101 deny icmp host 2.2.2.3 host 1.1.1.1 echo
access-list 101 deny icmp host 2.2.2.3 host 192.168.0.1 echo
access-list 101 permit ip any any
!
line con 0
!
line aux 0
!
line vty 0 4
password 1234
login
!
!
!
end

Router 2 Configuration

Router(config)#access-list 101 deny icmp host 3.3.3.4 host 1.1.1.2 echo
Router(config)#access-list 101 deny icmp host 3.3.3.4 host 1.1.1.1 echo
Router(config)#access-list 101 deny icmp host 3.3.3.4 host 192.168.0.1 echo
Router(config)#access-list 101 deny tcp host 3.3.3.4 host 2.2.2.2 eq telnet
Router(config)#access-list 101 deny tcp host 3.3.3.4 host 1.1.1.2 eq telnet
Router(config)#access-list 101 deny tcp host 3.3.3.4 host 192.168.0.1 eq telnet


Router(config)#access-list 101 permit ip any any

Interface Configuration

int fa 0/0

Router(config-if)#ip access-group 101 in

Router2#sh run
Building configuration...

Current configuration : 1117 bytes
!
version 12.2
no service timestamps log datetime msec
no service timestamps debug datetime msec
no service password-encryption
!
hostname Router
!
!
!
enable password just@123
!
ip cef
no ipv6 cef
!
interface Loopback1
ip address 192.168.2.1 255.255.255.0
!
interface FastEthernet0/0
ip address 3.3.3.3 255.0.0.0
ip access-group 101 in
duplex auto
speed auto
!
interface FastEthernet0/1
ip address 2.2.2.3 255.0.0.0
duplex auto
speed auto
!
router eigrp 101
network 192.168.2.0
network 2.0.0.0
network 3.0.0.0
auto-summary
!
ip classless
!
ip flow-export version 9
!
!
access-list 101 deny icmp host 3.3.3.4 host 1.1.1.2 echo
access-list 101 deny icmp host 3.3.3.4 host 1.1.1.1 echo
access-list 101 deny icmp host 3.3.3.4 host 192.168.0.1 echo
access-list 101 deny tcp host 3.3.3.4 host 2.2.2.2 eq telnet
access-list 101 deny tcp host 3.3.3.4 host 1.1.1.2 eq telnet
access-list 101 deny tcp host 3.3.3.4 host 192.168.0.1 eq telnet
access-list 101 permit ip any any
!
no cdp run
!
line con 0
!
line aux 0
!
line vty 0 4
password 1234
login
!
end

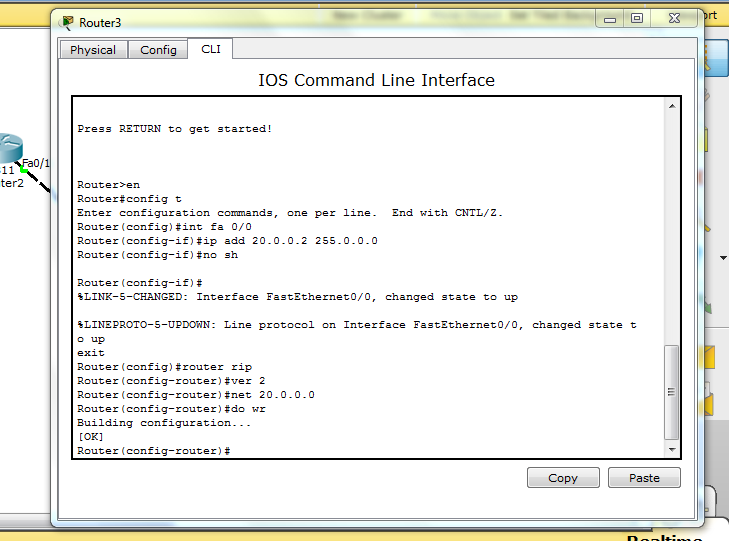
Router 3 Configuration

Router3#sh run

Building configuration...

Current configuration : 662 bytes
!
version 12.2
no service timestamps log datetime msec
no service timestamps debug datetime msec
no service password-encryption
!
hostname Router
!
enable password just@123
!
ip cef
no ipv6 cef
!
!
interface Loopback1
ip address 192.168.3.1 255.255.255.0
!
interface FastEthernet0/0
ip address 3.3.3.4 255.0.0.0
duplex auto
speed auto
!
interface FastEthernet0/1
no ip address
duplex auto
speed auto
shutdown
!
router eigrp 101
network 3.0.0.0
network 192.168.3.0
auto-summary
!
ip classless
!
ip flow-export version 9
!
!
line con 0
!
line aux 0
!
line vty 0 4
password 1234
login
!
end

Check ACL configuration is working 

Ping

Router3#ping 1.1.1.2

Type escape sequence to abort.
Sending 5, 100-byte ICMP Echos to 1.1.1.2, timeout is 2 seconds:
UUUUU

Success rate is 0 percent (0/5)

Telnet

Router#telnet 2.2.2.2
Trying 2.2.2.2 ...

% Connection timed out; remote host not responding


Install Packet tracer

By // No comments:

How to install Packet tracer ?

We are going to tell that how to install packet tracer on your system step to step.


Step 1:- Double click on Setup of Packet Tracer. 


Step 2:- Setup - Cisco Packet Tracer display on your screen where welcome to the cisco packet tracer 6.3 setup Wizard show and then click Next.


Step 4:- License Agreement 
                    Please read the following important information before continuing show where software license Agreement page displayed so select I accept the agreement and then click on Next.


Step 5:- Select Destination Location
                       Where should Cisco Packet Tracer 6.3 be installed?
In which select the Location of destination file where you would like to install your packet tracer installation file on your system and Click on Next.


Step 6:- Select Start Menu Folder 
                     Where should setup place the program's shortcuts?
Setup will create the program's shortcuts in the following Start Menu Folder and then click Next.


Step 7:- Select Additional Tasks
                    Which additional tasks should be performed?
This is because you want to create a shortcut on your desktop or not if you want to leave as its or not so unchecked mark on create a desktop icon and Click on Next.


Step 8:-Ready to Install
                Setup is now ready to begin installing Cisco Packet Tracer 6.3 on your computer
where you will see all the information which you select to perform task to install packet tracer on your system and Click on Install.


Step 9:- Completing the Cisco Packet Tracer 6.3 setup wizard on your system and Click on Finish to exit setup.


Congratulation....... You have successfully install packet tracer in your system.

OSPF Configure

By // No comments:

How to configure OSPF Routing on Packet tracer?


OSPF:- OSPF is stand for Open Shortest Path First Routing Protocol. It is standard of ISO. It is link state Routing Protocol. Prefer the lowest cost to packet transfer from source to destination. If cost is lowest so router send packet by lowest route. Cost is defined when a able speed 100 mbps after that emerged a cost and by lowest cost it will send packet by that route. In this method we used to wildcard mask subnet method.


Area 0:- It is backbone area which is connecting to one area to another area that is called ABR (Area Border Router). It is must to connect to area 0 without connectivity area 0 you can’t connect to each another area and router until you will not use another routing method.


Router0> enable
Router0# configure terminal
Router0(config)# int  fa 0/0
Router0(config-if)# ip add 10.0.0.1 255.0.0.0
Router0(config-if)# no sh
Router0(config)# int  fa 0/1
Router0(config-if)# ip add 11.0.0.1 255.0.0.0
Router0(config-if)# no sh
Router0(config-if)# exit
Router0(config)# router ospf 1
Router0(config-router)# network 10.0.0.0 0.0.0.255 area 0   
Router0(config-router)# network 11.0.0.0 0.0.0.255 area 0
Router0(config-router)# do wr


Router1> enable
Router1# configure terminal
Router1(config)# int  fa 0/0
Router1(config-if)# ip add 10.0.0.2 255.0.0.0
Router1(config-if)# no sh
Router1(config)# int  fa 0/1
Router1(config-if)# ip add 12.0.0.1 255.0.0.0
Router1(config-if)# no sh
Router1(config-if)# exit
Router1(config)# router ospf 1
Router1(config-router)# network 10.0.0.0 0.0.0.255 area 0   
Router1(config-router)# network 12.0.0.0 0.0.0.255 area 1
Router1(config-router)# do wr


Router2> enable
Router2# configure terminal
Router2(config)# int  fa 0/0
Router2(config-if)# ip add 11.0.0.2 255.0.0.0
Router2(config-if)# no sh
Router2(config)# int  fa 0/1
Router2(config-if)# ip add 13.0.0.1 255.0.0.0
Router2(config-if)# no sh
Router2(config-if)# exit
Router2(config)# router ospf 1
Router2(config-router)# network 11.0.0.0 0.0.0.255 area 0
Router2(config-router)# network 13.0.0.0 0.0.0.255 area 2
Router2(config-router)# do wr


Router3> enable
Router3# configure terminal
Router3(config)# int  fa 0/0
Router3(config-if)# ip add 12.0.0.2 255.0.0.0
Router3(config-if)# no sh
Router3(config-if)# exit
Router3(config)# router ospf 1
Router3(config-router)# network 12.0.0.0 0.0.0.255 area 1
Router3(config-router)# do wr

Router4> enable
Router4# configure terminal
Router4(config)# int  fa 0/0
Router4(config-if)# ip add 13.0.0.2 255.0.0.0
Router4(config-if)# no sh
Router4(config-if)# exit
Router4(config)# router ospf 1
Router4(config-router)# network 13.0.0.0 0.0.0.255 area 2
Router(config-router)# do wr


EIGRP configuration

By // No comments:

How to configure EIGRP Routing on Packet tracer?


EIGRP:- EIGRP stand for Enhanced Interior Gateway Routing Protocol.

-          Distance Vector (Hop Count)
-          Link state Routing Protocol ( Best Bandwidth)


It is a Hybrid Routing Protocol because it protocol works on distance vector and Link state basis. We can connect 255 hops in EIGRP routing. It works on reliable transfer protocol and bandwidth.
There are three tables in the EIGRP:-

You will see video to configure EIGRP Routing protocol on packet tracer.


1)      Topology Table
2)      Neighbor Table
3)      Routing Table


Router0> enable
Router0# configure terminal
Router0(config)# int  fa 0/0
Router0(config-if)# ip add 11.0.0.1 255.0.0.0
Router0(config-if)# no sh
Router0(config-if)# exit
Router0(config)# router eigrp 100
Router0(config-router)# network 11.0.0.0
Router0(config-router)# do wr


Router1> enable
Router1# configure terminal
Router1(config)# int  fa 0/0
Router1(config-if)# ip add 11.0.0.2 255.0.0.0
Router1(config-if)# no sh
Router1(config)# int  fa 0/1
Router1(config-if)# ip add 12.0.0.1 255.0.0.0
Router1(config-if)# no sh
Router1(config)# int  fa 1/0
Router1(config-if)# ip add 13.0.0.1 255.0.0.0
Router1(config-if)# no sh
Router1(config-if)# exit
Router1(config)# router eigrp 100
Router1(config-router)# network 11.0.0.0
Router1(config-router)# network 12.0.0.0
Router1(config-router)# network 13.0.0.0
Router1(config-router)# do wr


Router2> enable
Router2# configure terminal
Router2(config)# int  fa 0/0
Router2(config-if)# ip add 14.0.0.2 255.0.0.0
Router2(config-if)# no sh
Router2(config)# int  fa 0/1
Router2(config-if)# ip add 13.0.0.2 255.0.0.0
Router2(config-if)# no sh
Router2(config-if)# exit
Router2(config)# router eigrp 100
Router2(config-router)# network 13.0.0.0
Router2(config-router)# network 14.0.0.0
Router2(config-router)# do wr


Router3> enable
Router3# configure terminal
Router3(config)# int  fa 0/0
Router3(config-if)# ip add 12.0.0.2 255.0.0.0
Router3(config-if)# no sh
Router3(config)# int  fa 0/1
Router3(config-if)# ip add 14.0.0.1 255.0.0.0
Router3(config-if)# no sh
Router3(config-if)# exit
Router32(config)# router eigrp 100
Router3(config-router)# network 12.0.0.0
Router3(config-router)# network 14.0.0.0
Router3(config-router)# do wr


Download Cisco Packet Tracer

By // No comments:

Download Cisco Packet Tracer 6.2 and 7 for Windows and Linux.


Cisco Packet Tracer is a network computer scenario program that allow students to experiment gone network nature and behavior. Cisco Packet Tracer is invented by Cisco System and provided to free distribution for student. Cisco Packet Tracer cannot have allowed you to download free. Firstly, you have to register on the site then you can download but we provide you free download Cisco Packet Tracer for study.


We have latest version Cisco Packet Tracer 6.2 and 7 for Windows and Linux operating system.

Cisco Packet Tracer for Window


Cisco Packet Tracer for Linux


RIP Configuration

By // No comments:
How to configure RIP Routing on pack tracer?

RIP:- RIP stand for Routing information Protocol. It is protocol which communicates to one router to another router. It update after 30sec send his routing table to another router. It is distance vector protocol which protocol work on metric hop count after that is transferred the packet from source to destination. It has to follow shortage distance basis transfer the data. We can connect only 15 routers in RIP routing.


RIP routing diagram


There are two types of version in RIP:-
RIPv1 :- It works on class full networks
RIPv2:- It works on class less network and it also support VLSM subnetting.


Router1> enable
Router1# configure terminal
Router1(config)# int  fa 0/0
Router1(config-if)# ip add 10.0.0.1 255.0.0.0
Router1(config-if)# no sh
Router1(config-if)# exit
Router1(config)# router rip
Router1(config)# version 2
Router1(config-router)# network 10.0.0.0
Router1(config-router# do wr

RIP routing configuration on Router 1

Router2>en
Router2#config t
Router2(config)#int fa 0/0
Router2(config-if)#ip add 10.0.0.2 255.0.0.0

Router2(config-if)#no sh
Router2(config-if)#int fa 0/1
Router2(config-if)#ip add 20.0.0.1 255.0.0.0
Router2(config-if)#no sh
Router2(config-if)#exit
Router2(config)#router rip
Router2(config)#version 2
Router2(config-router)# network 10.0.0.0
Router2(config-router)# network 20.0.0.0
Router2(config-router# do wr

RIP routing configuration on Router 2

Router3> enable
Router3# configure terminal
Router3(config)# int  fa 0/0
Router3 (config-if)# ip add 20.0.0.2 255.0.0.0
Router3 (config-if)# no sh
Router3 (config-if)# exit
Router3 (config)# router rip
Router3 (config)# version 2
Router3(config-router)# network 20.0.0.0
Router3(config-router# do wr

RIP routing configuration on Router 3


Static Routing Configuration

By // No comments:

How to configure Static Routing on pack tracer?


Router: - Router is a network device. It works on Layer-3 device which is use for routing. It takes a decision on IP address base. It connects to different- different network IP address.

Please see video to configure Static Routing on Packet Tracer.


Static routing is a manual routing where we configure the remote network using static commands.

Static routing diagram

Router1> enable
Router1# configure terminal
Router1(config)# int  gig 0/1
Router1(config-if)# ip add 10.0.0.1 255.0.0.0


Router1(config-if)# no sh
Router1(config)# int gig 0/0
Router1(config-if)# ip add 20.0.0.1 255.0.0.0

Router1(config)# ip route 30.0.0.0 255.0.0.0 20.0.0.2/Gig 0/0

Static routing configuration on Router 1


Router2>en
Router2#config t
Router2(config)#int gig 0/0
Router2(config-if)#ip add 20.0.0.2 255.0.0.0
Router2(config-if)#no sh
Router2(config-if)#int gig 0/1
Router2(config-if)#ip add 30.0.0.1 255.0.0.0
Router2(config-if)#no sh
Router2(config-if)#exit
Router2(config)#ip route 10.0.0.0 255.0.0.0 20.0.0.1
Router2(config)#do wr

Static routing configuration on Router 2