

How to connect dvr to internet without static ip?
How to configure DVR and Camera for Remote Viewing?
How to configure DVR and Camera for Remote Viewing?
Today we are going to share with all of you that how to configure DVR and Camera for online accessing. It's very easy and helpful to configure. It help when you have not any static ip address still you are able to access Camera from outside network. but we use www.dvrdydns.com site of DDNS to access Camera.
Please follow step to step configure and access Camera from outside network:
Step1: Login Camera on Web Browser > Now Go to Config Tab > Network > Put HTTP Port and Server Port - By default HTTP Port 80 assign (i.e 81 and 6036)> Check mark on use the Following IP Address > Assign IP Address on Camera as given example > Apply.
IP Address : 192.168.0.100
Subnet Mask : 255.255.255.0
Gateway : 192.168.0.1
Preferred DNS Server : 192.168.0.1
Please follow step to step configure and access Camera from outside network:
Camera Configuration:
Step1: Login Camera on Web Browser > Now Go to Config Tab > Network > Put HTTP Port and Server Port - By default HTTP Port 80 assign (i.e 81 and 6036)> Check mark on use the Following IP Address > Assign IP Address on Camera as given example > Apply.
IP Address : 192.168.0.100
Subnet Mask : 255.255.255.0
Gateway : 192.168.0.1
Preferred DNS Server : 192.168.0.1
Note:- By default HTTP Port 80 and Camera always login on Internet Explorer.

Port Forwarding on Router:
Step2: Login Router on Web Browser > Click on Advanced Tab > Click on Virtual Server/Port Forwarder > Do Port Forwarding on Router as given below screen shot.
Example:-
Service Name: DVR Service Name: WebCamera
Protocol : TCP Protocol : TCP
Local IP Address : 192.168.0.100 Local IP Address : 192.168.0.100
Local Port : 6036 Local Port : 81
Wan Port : 6036 Wan Port : 81

if you have static IP Address. Hope now you are able to online Camera access.
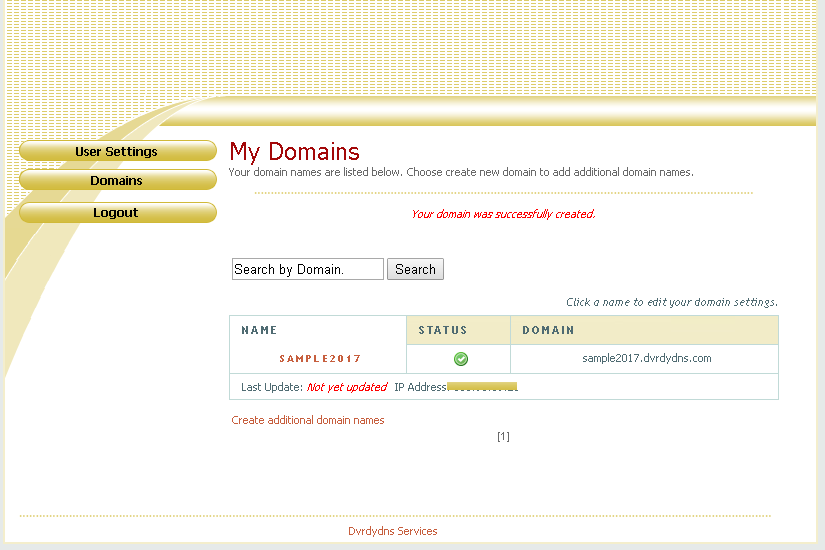
Create DDNS Domain name on dvrdydns website:
Step 3: Login on www.dvrdydns.com website > Click on Domain > Create new DDNS Domain name (i.e sample2017.dvrdydns.com).
Now Configure dvrdydns domain name on Camera:
Step4: Login Camera account on Web browser > Config > Network > Check mark on DDNS to enable > Now select DDNS Type (i.e www.dvrdydns.com) > Type User Name > Password > Host Domain (i.e sample2017.dvrdydns.com) > Apply.

Now You are able to access your Camera via DDNS Domain Name from outside Network.
Successfully!!!!!!
Note:- By default HTTP Port 80 and Camera always login on Internet Explorer.
0 comments:
Post a Comment